Fried Okra Fritters – My Southern Roots Are Showing

Fritters are one of my favorite foods and fried okra fritters are at the top of my list. You make a fritter out of okra and you have my attention.


Actually it doesn’t matter if it’s meat, fish, fruit or veggie. If you make a fritter out of it I’m gonna’ love it!

I grew up in the South and we love okra. We eat a lot of okra down here. It’s a heat-loving plant, very prolific, and is well suited to our climate.

I think that’s a good thing! Even though I use okra in soups, stews and gumbos frying is my go-to method for cooking okra. Just thinking about it makes my mouth water.

Now this recipe makes a fritter out of okra. I’m in heaven. Okra fritters!

Even if you’re not an okra fan you should try this recipe. You might just change your mind.

Be sure to follow Foodgasm Recipes on Pinterest for more great recipes.

Fried Okra Fritters
Prep Time
10 mins
Cook Time
10 mins
Total Time
20 mins
 

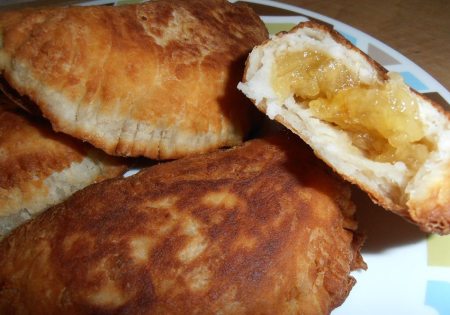
Fried Okra Fritters are a true southern dish and one of my favorite side dishes!

Course: Side Dish
Cuisine: American
Keyword: Fried Okra Fritters
Servings: 6
Ingredients
  • 1 bag frozen sliced okra thawed (not the family size bag)
  • 1 tsp. my house seasoning equal parts garlic powder, onion powder and pepper, combine and store in an airtight container
  • good pinch of salt
  • pinch of cayenne pepper
  • 1 large egg beaten
  • 1/4 C. plus 1 T. cornmeal
  • 1/4 C. all purpose flour
  • 1 T. milk
  • oil for frying
Instructions
  1. In a bowl, combine all ingredients well.
  2. Heat 1/2" oil in a large skillet over med. high heat. Drop fritters by big spoonful's into the heated oil and reduce the heat to medium.
  3. Fry, in batches, for 2-3 minutes per side until golden brown then transfer to a paper towel lined plate.
  4. (makes approx. 12 fritters)


Enjoy!

Up Next:

How to Cook Grits – The Best Southern Grits Recipe

Be sure to follow Foodgasm Recipes on Pinterest for more great recipes.

Homemade Sloppy Joes – Much Better Than Canned!

Why make Homemade Sloppy Joes? It’s easy to just buy a can at the store and mix it in with some cooked ground beef, but it’s so simple to make yourself and the taste so much better.


This is my go-to sloppy Joe recipe. Liquid smoke is the key ingredient here.

It could not be easier to throw these together, and they are a real family pleaser. They would be great for a football party too!

This recipe is not quite as quick as opening a can but once you try it you will agree the taste is well worth it!

Be sure to follow Foodgasm Recipes on Pinterest for more great recipes.

Homemade Sloppy Joes
Prep Time
30 mins
Cook Time
40 mins
Total Time
1 hr 10 mins
 

You really shouldn't bother with the canned stuff when it's so easy to make Homemade Sloppy Joes!

Course: Main Course
Cuisine: American
Keyword: Homemade Sloppy Joes
Servings: 6
Calories: 225 kcal
Ingredients
  • 1 pound lean ground beef
  • 1 cup ketchup
  • 1/4 cup dried minced onion
  • 3 tablespoons brown sugar or to taste
  • 2 tablespoons spicy brown mustard
  • 1 tablespoon Worcestershire sauce or more to taste
  • 1 tablespoon liquid smoke flavoring
  • 1 teaspoon minced garlic
  • 1 cup beef broth
  • salt and ground black pepper to taste
Instructions
  1. Cook and stir ground beef in a skillet over medium heat until meat is browned and crumbly, about 10 minutes; drain excess grease. Mix ketchup, dried onion, brown sugar, mustard, Worcestershire sauce, smoke flavoring, and garlic into beef, stirring until brown sugar has dissolved.
  2. Stir beef broth into beef mixture and bring to a boil; reduce heat to low and simmer until thick, about 30 minutes. Season with salt and black pepper.


Enjoy!

Up Next: 

Easy Company Hamburger Casserole

Be sure to follow Foodgasm Recipes on Pinterest for more great recipes.

Deep South Fried Apple Pies – Just Like Grandma’s

If you love McDonald’s fried apple pies…. you’ll really love these Deep South Fried Apple Pies. They are 100% BETTER! Just like my grandma used to make!


They are also free from all the preservatives, flavor modifiers, and colors those guys put in.

My Grandma made the best-fried apple pies in the world and even though I never knew her recipe this one is really close if not spot on.

The whole family looks forward to these when we gather for holidays or family events.

Be sure to Follow Foodgasm Recipes on Pinterest for more great recipes!

Deep South Fried Apple Pies
Prep Time
30 mins
Cook Time
19 mins
Dough Resting
1 hr
Total Time
49 mins
 

Just like Grandma's! These fried apple pies are sooo much better than the fast-food ones. 

Course: Dessert
Cuisine: American
Keyword: Deep South Fried Apple Pies
Servings: 6
Calories: 325 kcal
Ingredients
For the dough:
  • 2 C. self rising flour
  • 1 T. white sugar
  • 1/4 C. lard or shortening
  • milk
For the filling:
  • 6 oz. dried apples
  • water
  • 1 C. white sugar
  • oil for frying
Instructions
  1. In a mixing bowl combine the flour and sugar, cut in the lard using a pastry blender or 2 forks until crumbly. Add in just enough milk to form a dough.

  2. Knead just a bit, cover with plastic wrap, and place in the fridge for 1 hour.

  3. Meanwhile, put the dried apples in a pot and cover with water. Stir in the sugar and bring to a boil. Reduce heat to medium and cook until the apples are nice and tender and can be broken down with a fork. Add more water, if needed, to keep them from sticking and burning on the bottom.

  4. Once tender, remove from heat.

  5. Take half of the dough and place it on a well-floured surface. Using your hands press it out to a disk-like shape then use a dough roller and roll it very thin. Use a saucer or a 5" cookie cutter and cut the dough into rounds.

  6. Continue this until you have all the rounds that the dough will make.

  7. Take each round and place 2 spoonful's of the apple filling on the lower half. Fold the top half over and with a floured fork pinch around the edge to seal. Repeat with remaining dough and filling.

  8. Heat 1/2" oil to 300 degrees in a large skillet. Place a few in the oil and fry until nice and golden on one side, flip and do the same with the other. Drain on paper towels. Repeat with remaining pies.

  9. Makes approx. 8-10 pies.


Enjoy these Deep South Fried Apple Pies!

Up Next: 

French Silk Chocolate Pie

Be sure to Follow Foodgasm Recipes on Pinterest for more great recipes!

Southern Chess Bars

Great Southern Chess Bars! This recipe for chess squares works very well, and is easy. You can cut the recipe in half, and it fits a 9″ round pan perfectly.

Southern Chess Bars

They are really, really sweet and very rich. The recipe makes a lot of the cream cheese layer, you could easily cut it in half if you want less sugar.

Overall, if you like chess squares, this recipe is great. If you think it’s too much sugar, you’re obviously not from the South.

Be sure to follow Foodgasm Recipes on Pinterest for more great recipes.

Southern Chess Bars
Prep Time
30 mins
Cook Time
45 mins
Total Time
1 hr 15 mins
 

Southern Chess Bars are a delicious dessert easily made with cake mix!

Course: Dessert
Cuisine: American
Keyword: Southern Chess Bars
Servings: 6
Calories: 345 kcal
Ingredients
  • 1 18.25 ounce package yellow cake mix
  • 1 cup melted butter
  • 1 egg
  • 1 cup chopped pecans
  • 2 8 ounce packages cream cheese
  • 4 cups confectioners' sugar
  • 2 eggs
Instructions
  1. Preheat oven to 350 degrees F (175 degrees C). Grease and flour a 9x13 inch pan.
  2. Mix together the cake mix, melted butter and the egg. Stir in the chopped pecans. Press mixture into the bottom of the prepared pan. Set aside.
  3. In a large bowl, beat the cream cheese with the confectioners' sugar. Beat in the eggs one at a time until blended.
  4. Pour cream cheese mixture over crust. Bake in the preheated oven for 45 minutes.
  5. Cool in the pan, then cut into squares before serving.

Enjoy!

Be sure to follow Foodgasm Recipes on Pinterest for more great recipes.

Flash Fried Chicken – Better Than Southern Fried?

There is nothing I enjoy more than good ole southern fried chicken, but this Flash Fried Chicken trick made me happy because I didn’t have grease everywhere…

And yes, when I fry chicken like my Grandmothers did, I seem to get grease all over the stove and whatever shirt I am wearing.

I’ve been hearing and reading a lot about flash fried chicken lately so I decided to give it a try and see how it turns out and tastes.

Well, end result, in my opinion, is it’s just about as good as if I had stood over an iron skillet for 30 or more minutes and not near as a greasy mess to clean up.

I don’t know who came up with this idea but it’s a pretty darn good one.

This recipe uses the technique I read about, but I changed a few ingredients to what we prefer.

Be sure to Follow Foodgasm Recipes on Pinterest for more great recipes!

Flash Fried Chicken
Prep Time
30 mins
Cook Time
35 mins
Total Time
1 hr 5 mins
 

A really unique technique for making fried chicken without the mess!

Course: Main Course
Cuisine: American
Keyword: Flash Fried Chicken
Servings: 4
Calories: 280 kcal
Ingredients
  • 1 whole chicken cut up skin on (I used legs and thighs)
  • 2 C. chicken broth
  • water
  • 1 1/2 C. buttermilk
  • 1 1/2 C. all purpose flour
  • 1/2 tsp. garlic powder
  • 1/2 tsp. smoked paprika
  • 1/2 tsp. pepper
  • 1/4 tsp. salt
  • 1/4 tsp. cayenne pepper
  • Vegetable oil for frying
Instructions
  1. Place the chicken in a pot and add in the broth then enough water to cover the chicken. Bring to a boil, reduce the heat to med. and cook for 30 minutes, or until cooked through (this will depend on the size of your chicken pieces).
  2. Remove to a plate and set aside. Store the broth in a mason jar and put in the fridge and use as needed for recipes calling for broth.
  3. Fill a cast iron skillet with 1" of oil. Heat the oil to 375 degrees (if you use a deep fryer heat to 400 degrees).
  4. While the oil is heating, combine the flour and seasonings on a plate. Put the buttermilk in a dredging dish.
  5. When the oil is heated dredge the chicken in the flour then in the buttermilk, back in the flour and shake off excess and carefully place it in the skillet, skin side down.
  6. Working in batches, fry the chicken for 1 minute per side or until your desired golden color. Remove to a paper sack or paper towel lined plate and repeat with remaining chicken.

Enjoy Flash Fried Chicken!

Up Next:

Alton Brown’s Buttermilk Fried Chicken

Be sure to Follow Foodgasm Recipes on Pinterest for more great recipes!

Cajun Spiced Roast Beef – Juicy and Tender!

This Cajun Spiced Roast Beef is slow roasted for two hours in the oven and comes out juicy and tender.


Roasts such as rump, chuck or brisket are considered to be less tender than tenderloin or sirloin because they are leaner and have less marbling (layers of fat that occur evenly distributed in the meat).

Marbling makes the meat tender, juicy, and flavorful after cooking.

To compensate for marbling, such roasts can be braised (cooked in a small amount of liquid, covered with a lid, for an extended period of time over low heat). The result is moist, tender and delicious.

Be sure to Follow Foodgasm Recipes on Pinterest for more great recipes!

Cajun Spiced Roast Beef
Prep Time
30 mins
Cook Time
2 hrs
Marinating Time
6 hrs
Total Time
2 hrs 30 mins
 

Absolutely delicious way to do a pot roast. So easy and tender beyond belief and the flavor is to die for!

Course: Main Course
Cuisine: American
Keyword: Cajun Spiced Roast Beef
Servings: 6
Calories: 280 kcal
Ingredients
  • 2 1/2 - 3 lb. beef roast any cut you like
  • Cajun seasoning my recipe is below
  • 1 T. olive oil
  • carrots, celery, onion and potatoes
Instructions
  1. Rub the toast with the olive oil, then rub with a generous helping of the Cajun spice. I probably used a good 3 T. of the mixture.
  2. Place the roast in a Ziploc bag or covered dish and allow to marinate overnight or at least 6 hours in the fridge.
  3. Cut up the veggies and place in the bottom of a dutch oven. Place the roast and any juice on top of the veggies.
  4. Cover and place in a 325 degree oven for 2 hours. Remove and allow the roast to rest for 10 minutes before serving.

Cajun Seasoning

2 tsp.. salt
1 tsp. black pepper
1 T. garlic powder
1 1/2 tsp. onion powder
1 tsp. cayenne pepper
1 1/2 tsp. oregano
1 tsp. thyme

Mix together and store in an airtight container.

Cajun Spiced Roast Beef Tips and Tidbits

I like to use a pot roast for this recipe. Most often a chuck roast. They’re less expensive and when cooked right come out juicy and tender and deliciously flavored.

Because pot roast is a leaner, tougher meat than sirloin, it should be braised at a lower temperature — no more than 300 degrees Fahrenheit — over a long period of time.

A Dutch oven or slow cooker is good options for braising. With both, you can easily add broth, vegetables that go well with beef, such as carrots and potatoes, and whatever seasonings you enjoy.

One hour of low temperature braising per pound of pot roast is a good rule to go by.

Enjoy!

Up Next:

A Perfect Eye of Round Roast Beef

Be sure to Follow Foodgasm Recipes on Pinterest for more great recipes!

Crock Pot Pork BBQ Baby Back Ribs

Omg! These Crock Pot Pork BBQ Baby Back Ribs are not only one of the easiest BBQ rib recipes… but undoubtedly the tastiest, most delectable, fall-off-the-bone BBQ ribs I’ve ever tasted… even my neighbors kids were astounded.

Crock Pot Pork BBQ Baby Back Ribs

This recipe will go down as one of our top add-ins for family get together recipes.

While your pork ribs are slowly cooking along, you will have plenty of time to cook up some side dishes to go along with the ribs.

Two of my favorites with BBQ is basic potato salad or Cole slaw. Both will go great with your pork ribs dinner.

Be sure to Follow Foodgasm Recipes on Pinterest for more great recipes!

Crock Pot Pork BBQ Baby Back Ribs

Perfect for those times you want to impress guests but conditions are not right for a backyard BBQ!

Course: Main Course
Cuisine: American
Keyword: Crock Pot Pork BBQ Baby Back Ribs
Servings: 4
Calories: 320 kcal
Ingredients
  • 2.5 to 3 lb. pork back ribs
  • 3 T. my all purpose seasoning recipe below
  • your favorite BBQ sauce
All Purpose Seasoning:
  • 2 T. smoked paprika
  • 1 T. brown sugar
  • 1 T. salt
  • 1 T. adobo found in the spanish section of the grocery store
  • 1 tsp. black pepper
Instructions
  1. Mix the seasoning ingredients together and store in an airtight container.

For the ribs:
  1. Cut the ribs in half and rub them all over with the all purpose seasoning. Place them in a Ziploc bag and put in the fridge overnight.
  2. When ready to cook, place the ribs on their sides in the crock pot with the meaty side facing the outer part of the crock pot (I used a 4 quart crock pot for mine). Pour in any juice left in the Ziploc bag.
  3. Pour 3/4 C. of BBQ sauce over the top of the ribs. Cover and cook on low for 6 hours, spooning the sauce over the ribs every so often as they cook.
  4. When you are ready to serve them, cover a baking sheet with tinfoil, turn the broiler on high and carefully remove the ribs to the baking sheet. Brush with a little more BBQ sauce and pop under the broiler to 2-3 minutes to add more color to the ribs.
  5. This is really optional, I do not always do it unless we have company coming for supper.

Enjoy!

Be sure to Follow Foodgasm Recipes on Pinterest for more great recipes!

Up Next: 

Crock-Pot Beef Roast

With this pot roast just throw everything into your slow cooker and take it easy. You know you’re going to be having something amazing for dinner.

Be sure to Follow Foodgasm Recipes on Pinterest for more great recipes!

Make Ahead Breakfast Burritos – Much Better Than Drive-Thru

These Make Ahead Breakfast Burritos are much better than fast food! They’re flavorful, high protein, and convenient for walking/driving and eating.

Make Ahead Breakfast Burritos

Burritos are one of the fast food industry’s best sellers in the morning. Unfortunately like most things from fast-food restaurants, they are usually full of other not so great things.

The obvious solution is to make them yourself. Its a very easy process that produces excellent, highly portable results.

To start, you need to spend about 30 minutes of your time making a batch of burritos. Then just prepare them for freezing and freeze ’em up.

When you are ready to eat the burritos. Pull one out of the freezer the night before, or just put it into the microwave frozen in the morning. Heat until it reaches the desired temperature.

It is super easy to transport to work or school and it has some great health benefits. Benefit number one is just making sure you have breakfast!

Be sure to Like Foodgasm Recipes on Facebook for more great recipes.

Make Ahead Breakfast Burritos
Prep Time
30 mins
Cook Time
20 mins
Total Time
50 mins
 

These Breakfast Burritos are the solution to "breakfast skippers" problem. 

Course: Breakfast
Cuisine: Mexican
Keyword: Make Ahead Breakfast Burritos
Servings: 12
Calories: 280 kcal
Ingredients
  • 12 eggs
  • 1 tbsp extra virgin olive oil
  • 1 lb turkey sausage removed from casings, cooked and drained
  • 1/2 cup each diced green pepper red pepper, onion
  • 2 cups frozen hash brown potatoes
  • 1 tbsp taco seasoning mix
  • 1 heaping tbsp green chilis
  • 1/2 cup chunky salsa
  • 2 cups shredded old Cheddar cheese
  • 24 flour tortillas
Instructions
  1. Saute the peppers, and onion over medium high heat in the olive oil until beginning to soften. Add the hash browns, taco seasoning, green chilis  and continue to saute until golden and cooked through.
  2. Add to the cooked sausage, add the salsa and mix everything together well.
  3. Whisk the eggs together and begin to scramble in a non stick pan treated with cooking spray or oil over medium high heat.. When the eggs are still somewhat soft, add the sausage mixture and continue to scramble together. Remove from heat when eggs appear to be almost done.

  4. Place 1/2 cup of the egg mixture onto each burrito and top with cheese.
  5. Roll up each tortilla to make burritos, folding in the ends and rolling up. Place on parchment paper lined cookie sheets and freeze until solid. Then wrap individually and package in zip-lock freezer bags.

Enjoy!

Up Next: 

IHOP Buttermilk Pancakes

These are fantastic! Not only great for breakfast but lunch and dinner also. Really easy to make too so I’m not buying pancake mix

Oreo Cheesecake – Easy To Make And Delicious!

This Oreo Cheesecake is the easiest cheesecake in the world. Talk about simple! If you have cheesecake baking fears put them aside now.


In fact, it’s so easy it would be a good project for the kiddies to make. They’ll love crushing up Oreo cookies!

It’s also a cheesecake lovers cheesecake. Very rich and dense just like a cheesecake should be.

Did I say super easy? Yes. Even though it’s very easy you will get rave reviews from all who taste it. It’s absolutely delicious! Make it once and try it and you’ll make it again and again.

Be sure to Follow Foodgasm Recipes on Pinterest for more great recipes!

Oreo Cheesecake
Prep Time
30 mins
Cook Time
1 hr
Total Time
1 hr 30 mins
 

Don't be afraid of cheesecakes. This one is very easy and absolutely delicious!

Course: Dessert
Cuisine: American
Keyword: Oreo Cheesecake
Servings: 6
Calories: 325 kcal
Ingredients
  • 18 Oreo cookies crushed in a blender
  • 1/4 cup melted butter
  • 24 ounces cream cheese softened
  • 1 14 ounce can sweetened condensed milk
  • 3 eggs
  • 2 teaspoons vanilla
Instructions
  1. Mix Oreos and butter. Press them down in a greased 9 inch spring form pan.
  2. In a large bowl, cream together remaining ingredients until well blended. Pour into spring-form pan.
  3. Break up 8 Oreos and drop on top of the batter.
  4. Bake for 45-60 minutes at 300 Deg F.
  5. Don't bake till it cracks.
  6. Cool to room temperature and chill in the refrigerator before removing pan.

Be sure to Follow Foodgasm Recipes on Pinterest for more great recipes!

Oreo Cheesecake Tips and Tidbits

Cheesecakes, unlike other cakes where beating air into the batter is key, suffer if over-mixed. For best results, have all the ingredients (cheese, eggs, liquids, and flavorings) at room temperature before blending.

The big bugaboo with cheesecake is cracking. Cheesecakes, like custards, rely heavily on eggs to set, which means they must cook gently and slowly. Otherwise, the eggs puff, overcook and get grainy, then constrict when cooled, resulting in an undesirable split in your smooth cake.

The main trick with cheesecake is gentle, coaxing heat. Just as you want them to cook slowly, you also want them to cool gradually. Quick changes of temperature upset the structure of the cake, causing cracks. For a moister, creamier cake, turn off the heat when the center’s still loose and let cool in the oven.

Many cheesecakes are baked in a water bath (a pan of water) to moderate the temperature. Since water remains at a constant temperature, the cake sets slowly, resulting in a super-creamy cheesecake.

With richly flavored cheesecakes, like chocolate, the same result can be achieved by baking slowly at low temperatures.

To prevent the cheesecake from cracking as it cools, run a thin knife around the edge of the cake as soon as it comes out of the oven. After chilling, remove the springform ring (but not the metal base).

A crack in your cheesecake is not the end of the world. Simply use it as a starting point when cutting your first slice.

Up Next: 

Chili Dog Casserole – Quick and Easy

Be sure to Follow Foodgasm Recipes on Pinterest for more great recipes!

Skinny King Ranch Chicken Casserole

Even though this is Skinny King Ranch Chicken Casserole and aids in weight loss, it sacrifices absolutely nothing in taste!


Include enough skinny dishes in your everyday meals and you can lose weight without even trying.

I love this casserole! What a melty, gooey, gorgeous, casserole of chicken goodness!

Be sure to follow Foodgasm Recipes on Pinterest for more great recipes.

Skinny King Ranch Chicken Casserole Recipe
Prep Time
35 mins
Cook Time
25 mins
Total Time
1 hr
 

All the great flavor of King Ranch Casserole without the calories. You family won't know the difference!

Course: Main Course
Cuisine: American
Keyword: Skinny King Ranch Chicken Casserole
Servings: 6
Calories: 225 kcal
Ingredients
  • 2 cups chicken tenders (one small package) cut into bite sized pieces
  • 2 tsp Creole seasoning spice
  • 1 medium onion diced
  • 1 diced red pepper
  • 1 tbsp of finely diced jalapeno peppers
  • 2 cloves minced garlic
  • 1 cup s of canned stewed tomatoes
  • 1/3 cup s of Salsa
  • 1/2 tsp. of cumin
  • 1/2 cup s unsweetened Greek Yogurt (at room temp)
  • 2 cups grated cauliflower florets
  • 1 tin niblets corn
  • 1 cup black beans drained and rinsed
  • 1/4 cup sliced green onions
  • 1/4 cup fresh cilantro
  • 1 tsp fresh lime juice
  • 1/2 cup sharp cheddar cheese
  • 1/2 cup crushed taco chips
Instructions
  1. Saute the grated cauliflower in an un-greased non stick pan for 5 minutes over medium high until just beginning to go toasty and golden.
  2. Add the black beans, corn, cilantro, green onion, and fresh lime juice. Set aside.
  3. Sprinkle the chicken tenders with creole spice and saute with the onion, red pepper and jalapeno pepper in a non stick pan treated lightly with oil over medium high heat. When the chicken is cooked through and the vegetables are soft and translucent, add the minced garlic and saute another 30 seconds.
  4. Add the tomatoes, salsa, cumin, and continue to stir. Cover and remove from the heat. Let rest 10 minutes.
  5. Add a little sauce at a time to the yogurt, stirring well in order to temper it. Gently stir the tempered yogurt into the chicken and tomatoes.
  6. Gradually re-heat the chicken and sauce and re-heat the "rice" so that everything is nice and hot.
  7. Place the cauliflower rice mixture in a 9x13 casserole treated lightly with cooking spray or oil. Cover with the chicken mixture.
  8. Sprinkle the top with the cheese and the taco chips. Place under a preheated broiler until the cheese is melted and the casserole is bubbly.
  9. Let rest 5-10 minutes before serving. Enjoy!


Enjoy!

Up Next: 

Oreo Cheesecake – Easy To Make And Delicious!

Be sure to follow Foodgasm Recipes on Pinterest for more great recipes.